
I don’t want to write what is Azure Data Lake. Simply click the link to know more. Instead of that, I have prepared for you a short and easy-to-follow step-by-step guide to have your own Data Lake. The only thing you need to have is your own Azure subscription. If you don’t have one, click this link and create a free subscription with enough starting credit to play with it.
Azure Data Lake consists of two important parts working together:
- Azure Data Lake Storage – massively scalable, secure data lake functionality built on Azure Blob Storage.
- Azure Data Lake Analytics – main data lake analytics service using Azure Data Lake Storage to read data from and process them
Because Azure Data Lake Analytics service depends on Azure Data Lake Storage, we will first create that one and then continue with Data Lake Analytics.
Creating Azure Data Lake Storage
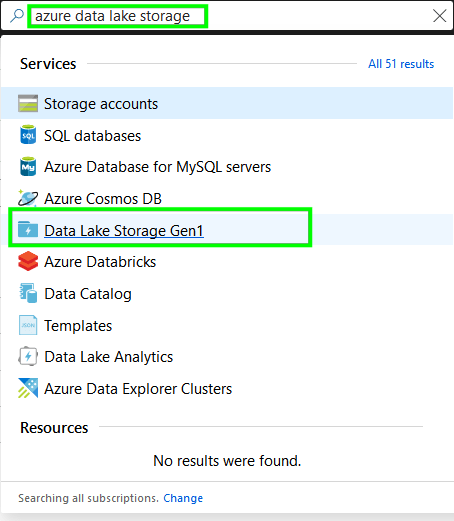
1. Open Azure Portal and search for Azure Data Lake Storage. You can select Gen1. Gen2 will be covered in another post.
2. Click Add button to initiate the New Data Lake Storage Gen 1 window:
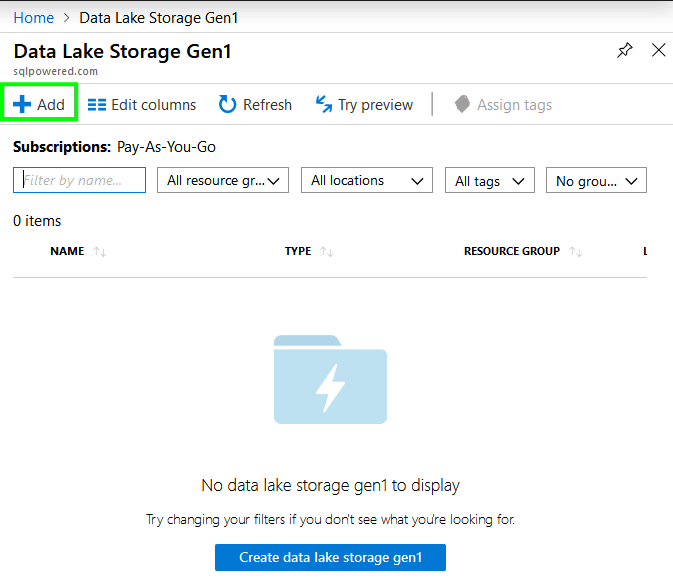
3. Fill all mandatory fields base on your preferred values.
You should setup:
- Name which will form later also URL of your storage. Follow naming rules.
- If you have more Subscriptions select the proper one.
- Resource group means where your Data Lake Storage belongs. If you don’t have one, create new one.
- The Location should be selected geographically closer to your current location.
Keep other settings as they are and press the Create button.

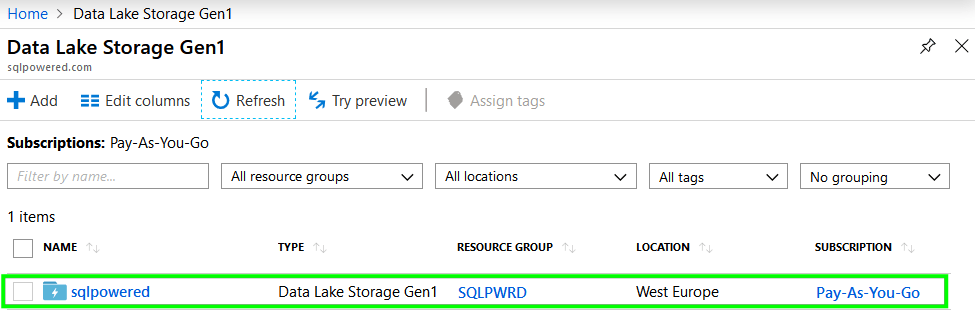
4. You should see a notification that your request was registered and is being processed. Once it’s completed then press the Refresh button and you should see your new Data Lake Storage Gen1 object in the list:
With this step, we have completed the preparation of the storage account and we can continue with the creation of the Data Lake Analytics service.
Configure Azure Data Lake Analytics
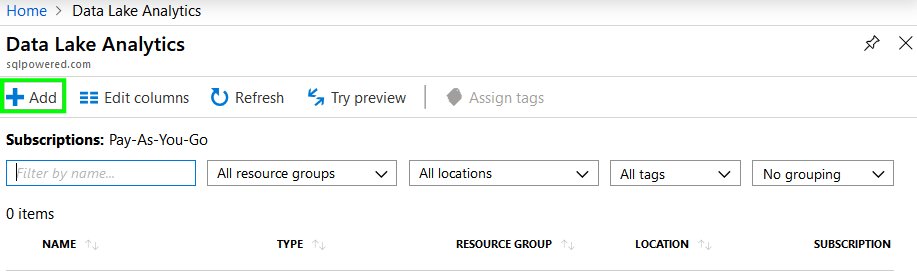
- Go back to Portal and search for Data Lake Analytics.

2. Press the Add button to create a new Data Lake Analytics instance.
3. Fill in all required fields.
You can do it the same way as you did for storage configuration.
Important is to select your previously created Data Lake Storage account to be used with this instance of Data Lake Analytics.

After the form is completed and validated press the Create button. You should see a notification about processing your request.
4. Once processing is completed press the Refresh button and you should see your new instance of Data Lake Analytics services listed below.
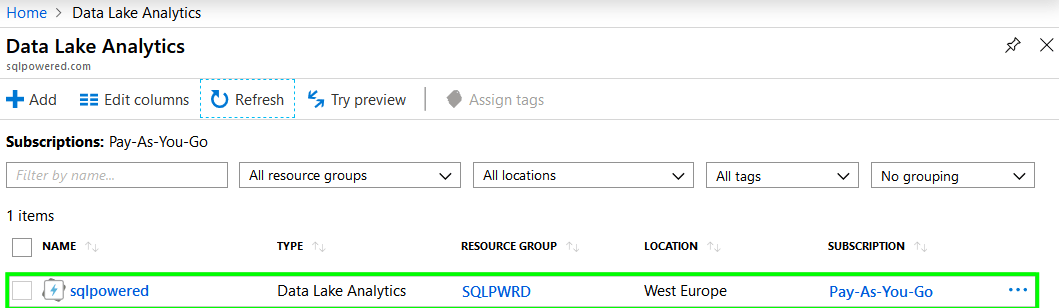
With all these steps we have successfully completed the first part of our tutorial: Azure Data Lake Storage account and Azure Data Lake Analytics service were created and are ready to be used.
Using Azure Data Lake
In the second part of this tutorial, we will test the basic scenario of how to use configured services to process data sample data.
First of all open this link to download a sample CSV file of 500000 sales records.zip from cool page http://eforexcel.com/wp
Unzip the file locally and continue with the following steps:
Upload sample data to Azure Data Lake Storage
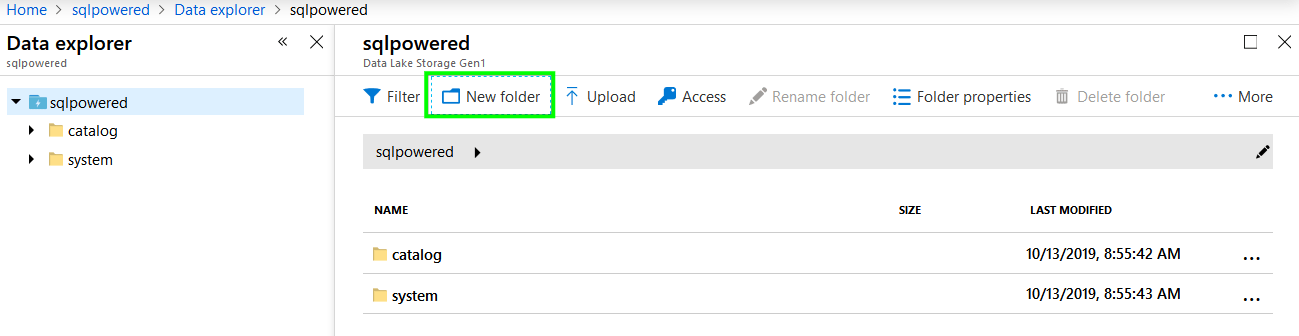
1. Navigate to the All resources icon in the left panel in Portal and from the list click on the Data Lake Storage Gen 1 resource we have created before. After it will open there is a Data explorer button you should click on.

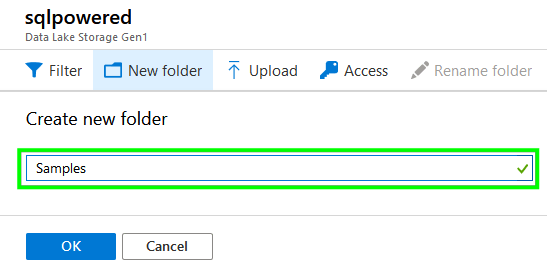
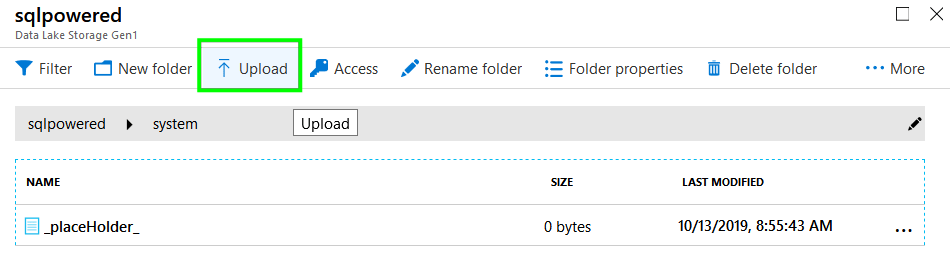
2. Create a new folder called Samples where we will upload our sample data file.
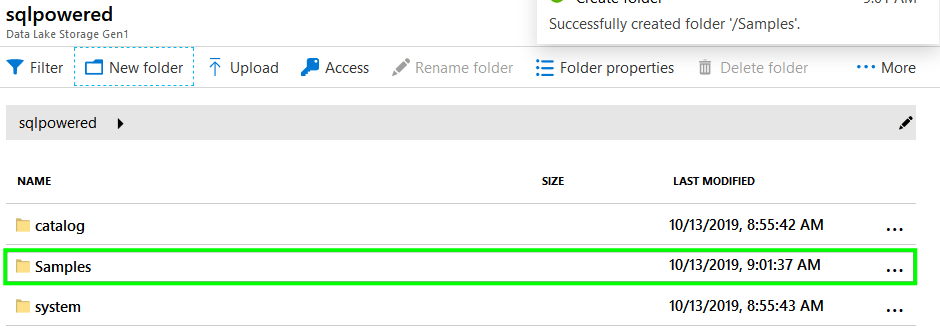
3. After the folder is ready double click it to open and then press the Upload button and select the file 500000 Sales Records.csv you have downloaded and unzipped before.
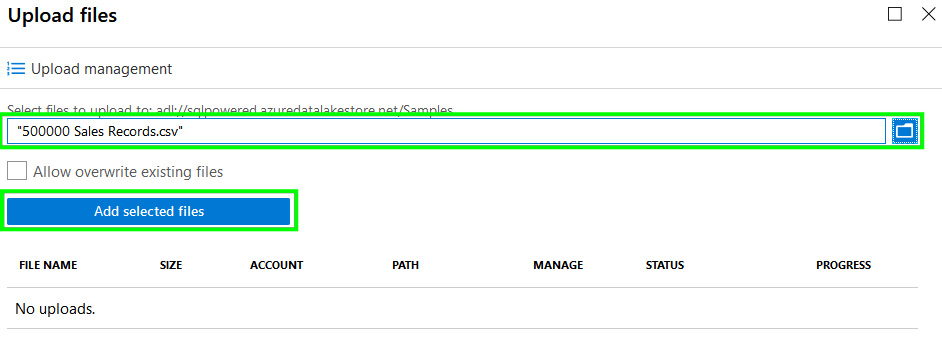
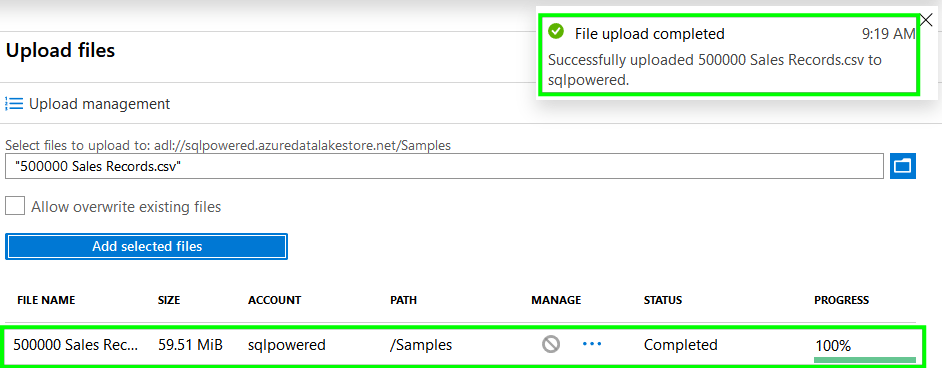
Uploading the file can take some time based on your connection speed. You can observe the progress and when the task is completed notification will popup.
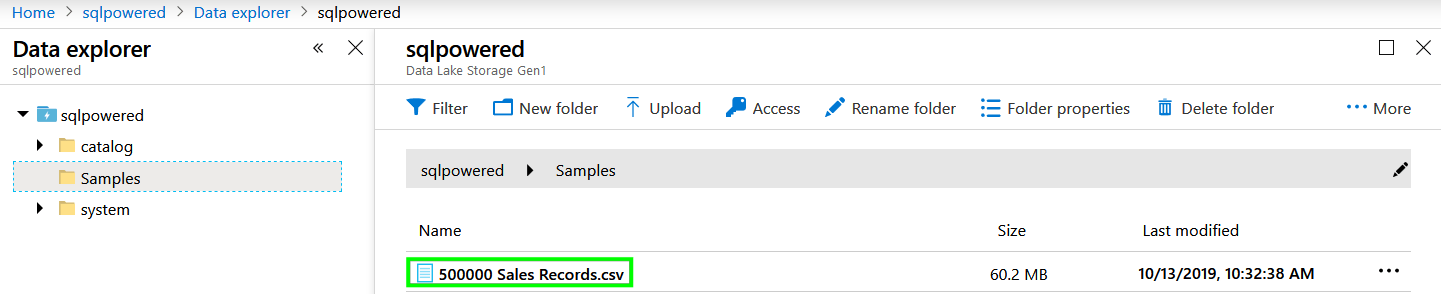
When the file was successfully uploaded navigate back to the Samples folder and double click file name.
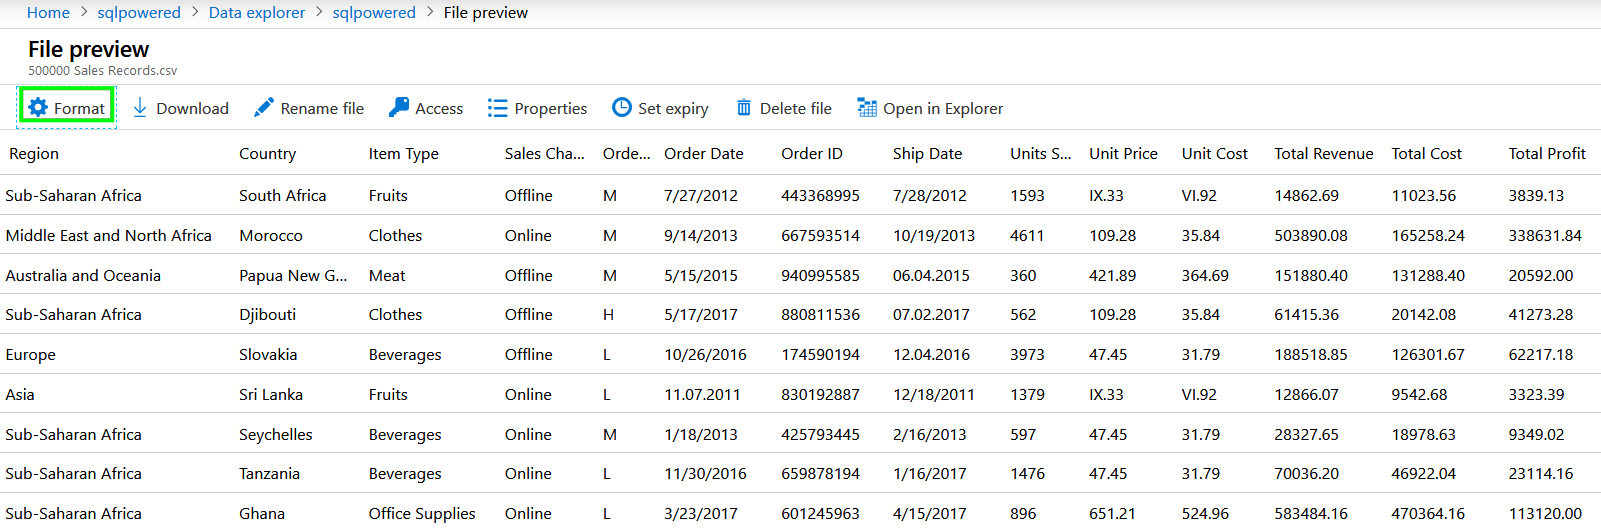
It will open the file and previews its content. But at a first look, the text isn’t divided into columns. You can fix it in a minute: just click the Format button and select semicolon as column divider and mark the first row as containing column names. Azure will format file content as you can see in the picture:
At this stage, we have successfully prepared our sample data in Azure Data Lake Storage and is time to do some basic data analysis over the data set.
Create a new Data Lake Analytics job and query our data with U-SQL
1. Navigate to the All resources menu item in the left panel of Azure Portal and select the Data Lake Analytics services we have created in previous steps. Once the window with its detail popup, press the button New job to create your first data analytics job.

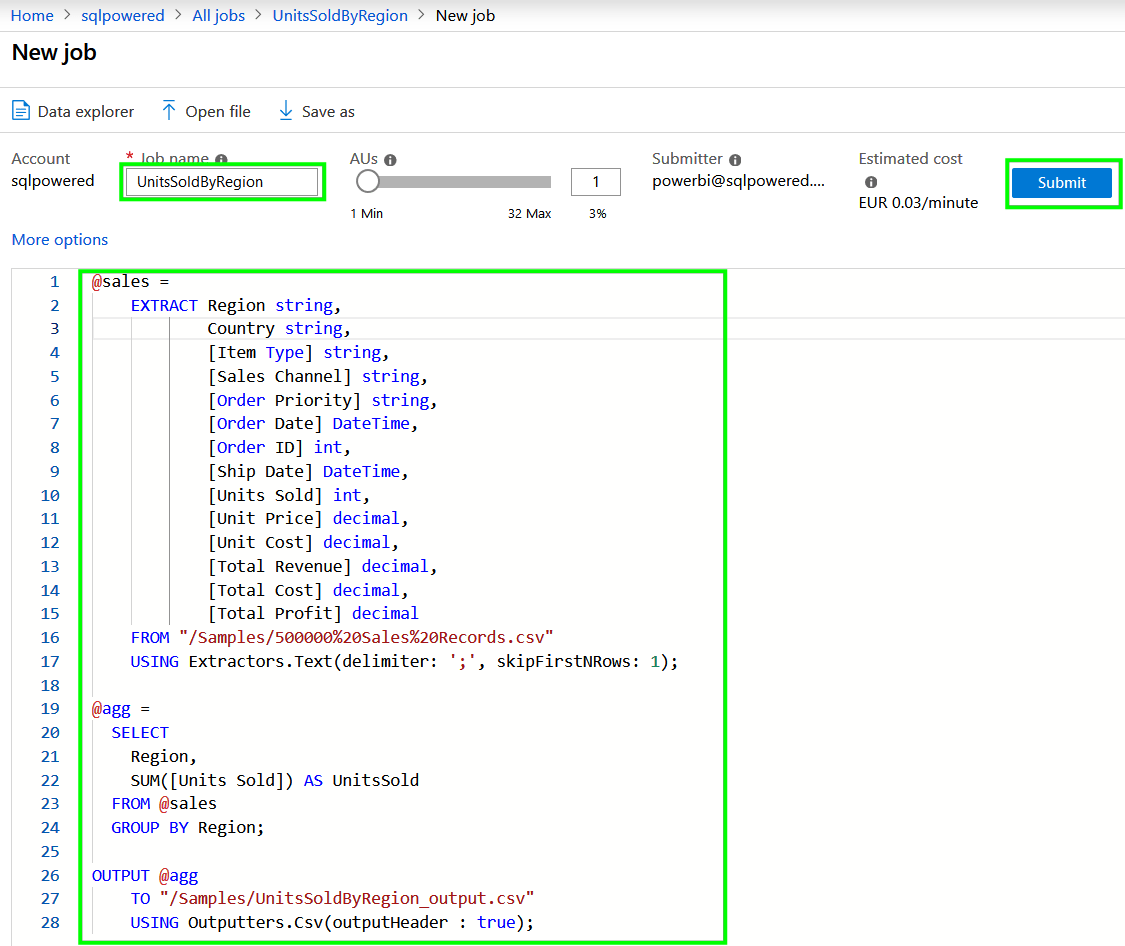
In the box below is a sample U-SQL script. You only need to copy/paste it to New job window like in the following picture. An explanation of the script can be found there. In a few words, we will load the content of the file with a text extractor, summarize the total number of Units Sold by Region and save the output to another text file in the same folder.
@sales =
    EXTRACT Region string,
            Country string,
            [Item Type] string,
            [Sales Channel] string,
            [Order Priority] string,
            [Order Date] DateTime,
            [Order ID] int,
            [Ship Date] DateTime,
            [Units Sold] int,
            [Unit Price] decimal,
            [Unit Cost] decimal,
            [Total Revenue] decimal,
            [Total Cost] decimal,
            [Total Profit] decimal
    FROM "/Samples/500000%20Sales%20Records.csv"
    USING Extractors.Text(delimiter: ';', skipFirstNRows: 1);

@agg =
  SELECT
    Region,
    SUM([Units Sold]) AS UnitsSold
  FROM @sales
  GROUP BY Region;

OUTPUT @agg
    TO "/Samples/UnitsSoldByRegion_output.csv"
    USING Outputters.Csv(outputHeader : true);
2. Paste the script and enter the name of the job: UnitsSoldByRegion. Press Submit button and the job will be created and immediately queued for processing.
There are three statuses of job processing: Preparation, Queued, and Running. You can observe the progress graphically in the right window where is processing plan available:
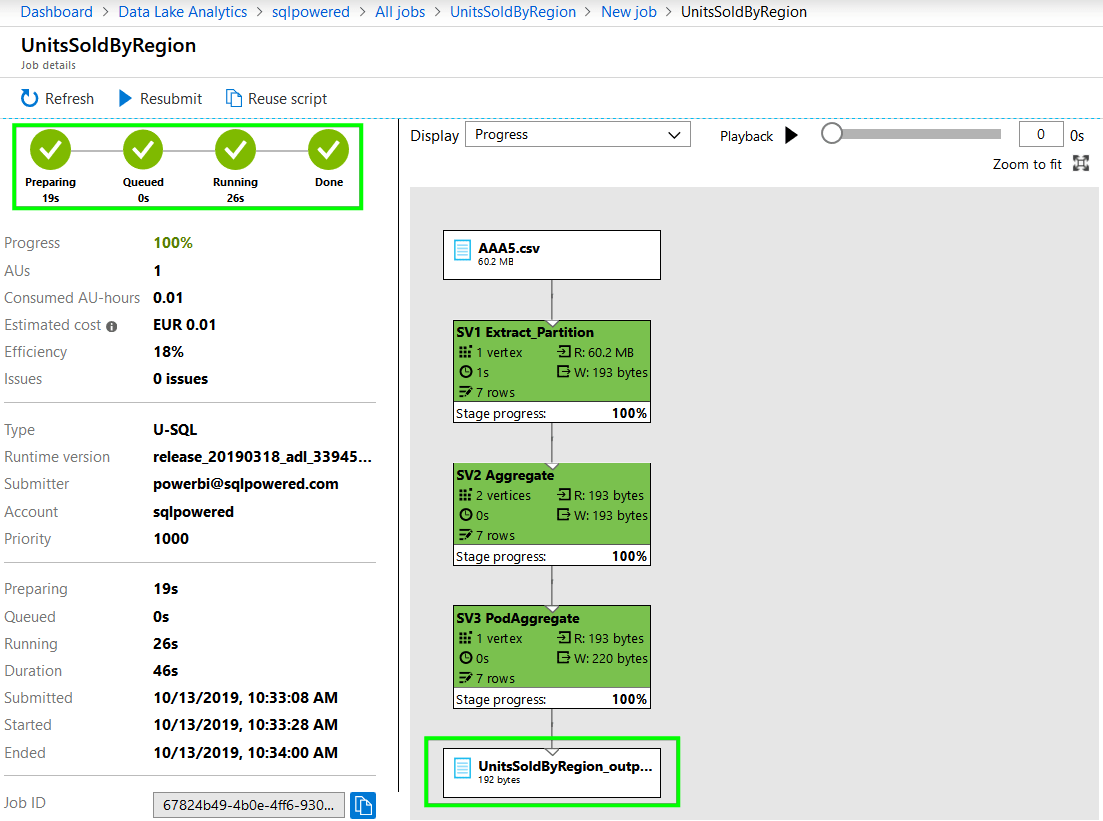
After the job has been completed you can click on the last box in the processing steps chart. This will navigate you to the results file.
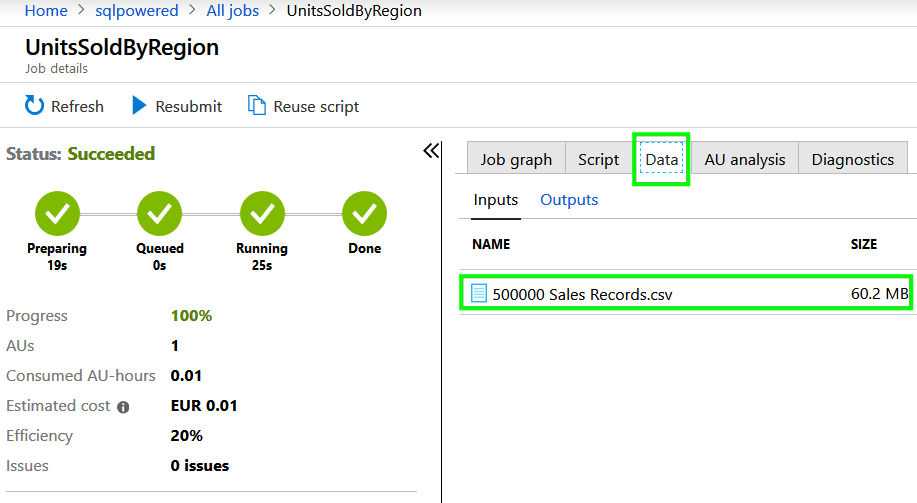
Press the Data button and observe file content:
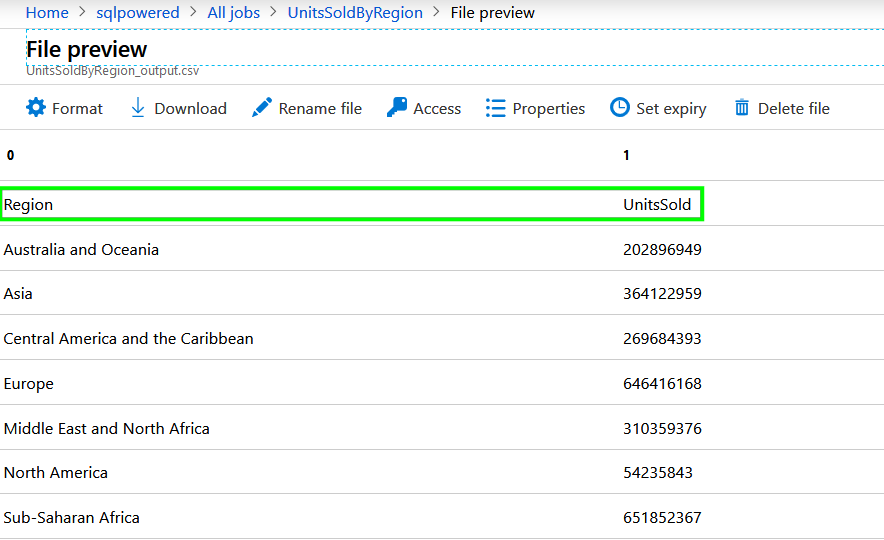
This is exactly what we were trying to achieve: Total number of Units Sold by Region. Columns are named exactly as we have specified in the U-SQL script.
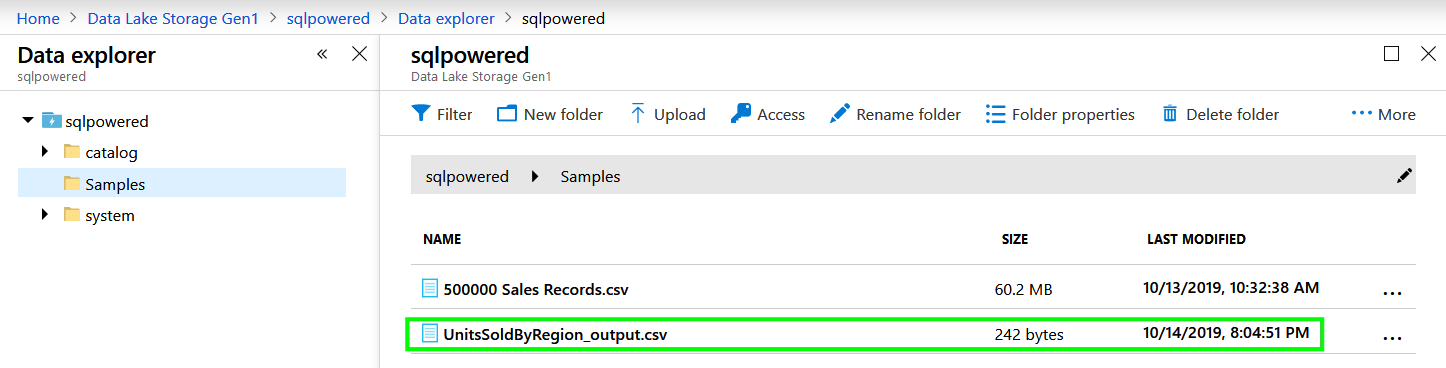
If you will navigate back to Azure Data Lake Storage you will see our output file there.
That’s all. You have successfully configured your first Azure Data Lake Storage, uploaded some data into it, aggregated values using Azure Data Lake U-SQL language, and stored results in a text file.