
A migration of models between two Master Data Services instances is an easy step until we will discover that the UI available option works only for model definitions (metadata) and we must move data in a separate step. But don’t scratch your head. It’s just one or two command lines and you can use it easy for automation.
Les’s look at the UI supported option first.
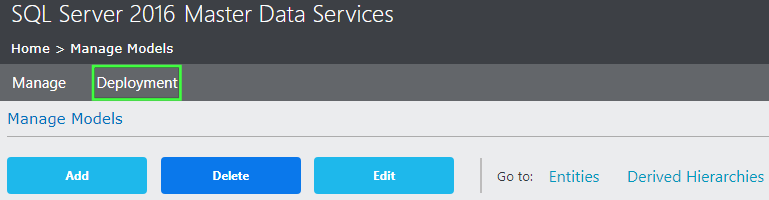
1. Go to MDS, select the proper model

2. Open the model and press the Deployment button.
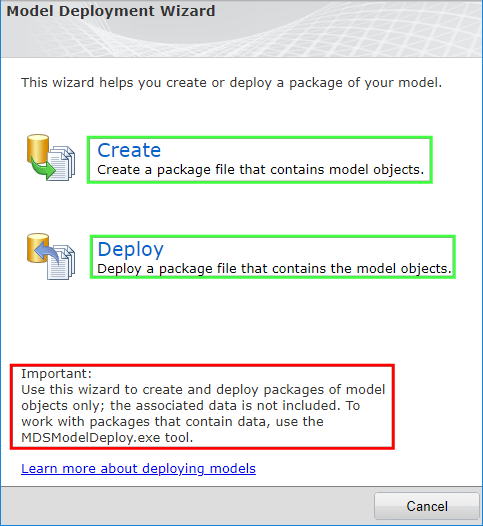
3. Model Deployment Wizard will appear with option co Create (export) deploy package for the model or Deploy a new model to the MDS instance. A warning is shown there make us aware of the fact that only model definition(metadata can be export/imported using the wizard. Fro model data movement we must use the command-line tool MDSModelDeploy.exe described below.
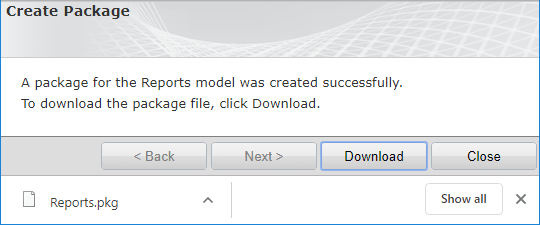
4. Initiate package creation for the selected model.

5. The generated model package will be ready for download in a short.
To export the full model package with data we need to call the command-line tool MDSModelDeploy.exe as mentioned above. Its located (based on SQL Server version) in the folder C:\Program Files\Microsoft SQL Server\140\Master Data Services\Configuration.
Executed the tool to export Reports model from the source MDS1 instance to a new package file:
MDSModelDeploy createpackage -model “Reports” -service MDS1 -version VERSION_1 -package “c:\MDS\Reports_Data.pkg” -includedata
Next use the same tool to import the package to the target MDS2 instance:
MDSModelDeploy deploynew -model “Reports” -service MDS2 -package “c:\MDS\Reports_Data.pkg”
For more details please review: